
Váš košík je momentálne prázdny!
Royal Icing Preparation for Christmas Gingerbread Cookies Decorating: A Detailed Guide and Tips for Perfect Results
„Decorating gingerbread cookies isn’t just about the final look. It’s about the moments when we dive into creating, add love to every detail, and leave a piece of ourselves in each cookie.“
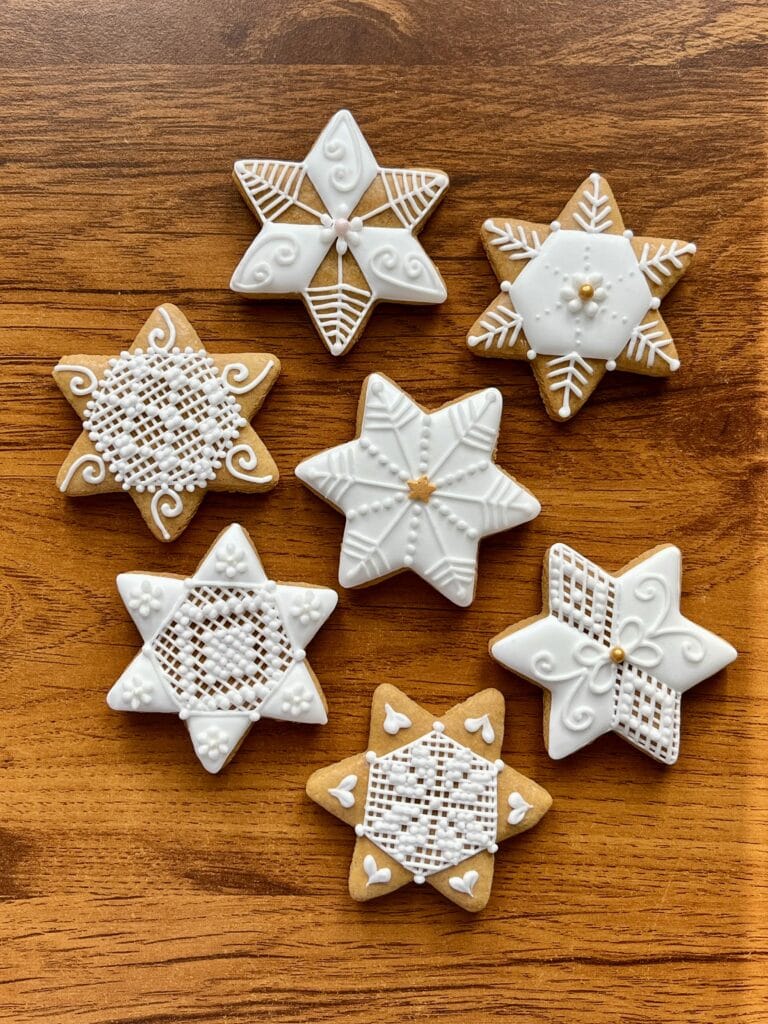
Gingerbread cookies are a holiday classic, and for many of us, we can’t imagine them without thoughtful, precise decorations. Decorating brings not only visual appeal but also a creative touch to these festive treats, making the process as relaxing as it is impressive. In this article, you’ll find a guide to preparing Royal Icing for decorating gingerbread cookies (often mistakenly referred to as „gingerbread glaze“), helping you master the process with ease and achieve results that will both delight and inspire.

Decorating is not only one of the most enjoyable aspects of preparing gingerbread cookies, but it also allows for endless creativity. Moreover, it adds aesthetic value, personality, and uniqueness to each cookie. Whether you prefer traditional patterns, festive themes, or modern minimalist designs, decorating offers a chance to make each cookie special. To achieve the best results, focus on finesse, precision, and attention to detail, as these elements can transform simple gingerbread cookies into tiny works of art. Therefore, it’s important to set aside enough time for decorating, especially since the process can take days depending on the number of cookies and the techniques you choose to use.
1. Why Royal Icing is the Best Choice for Gingerbread Decorating?
Royal icing is popular for its simplicity in preparation and for allowing you to adjust the thickness as needed. The resulting texture lets you create fine details like dots and thin lines and smooth fills on larger areas of cookies, various shapes, ornaments, layers, and even “glue” pieces together for gingerbread houses or other structures. Unlike basic sugar-and-water glazes, royal icing holds its shape longer and is more durable.
2. Essential Ingredients and Step-by-Step Preparation of Royal Icing
Ingredients:
- Royal Icing
- Water
- Food color
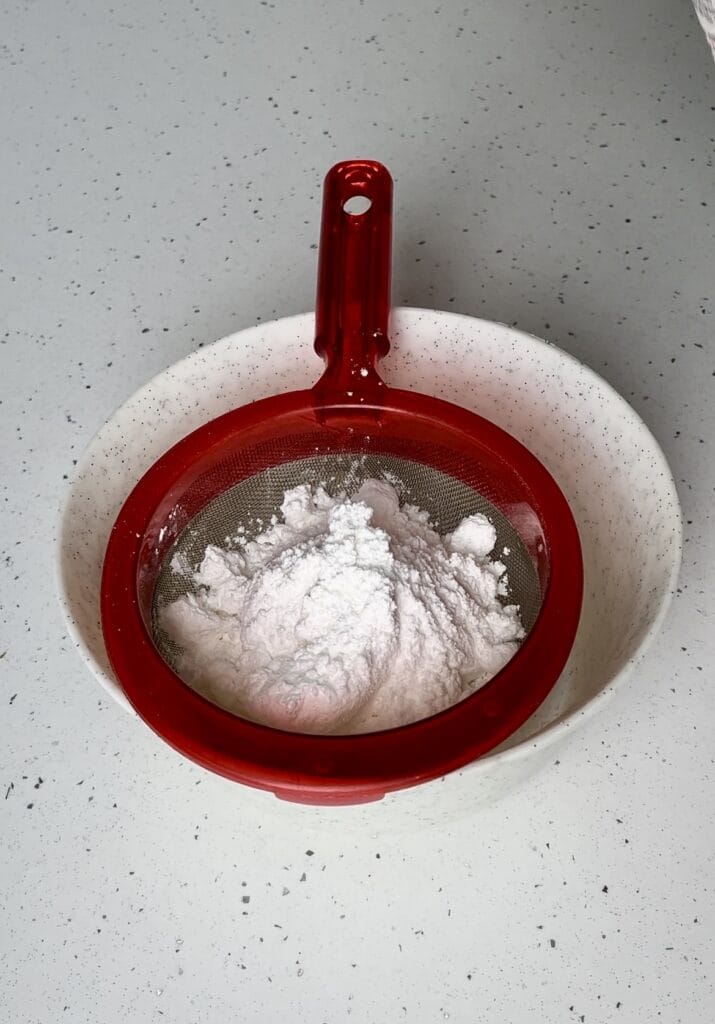
1. Sift the icing – Pass the powdered royal icing through a fine sieve. This step is essential to prevent lumps that could block your piping bag tip.
- 2. Add water – Add a bit of cold water and start mixing with a mixer.
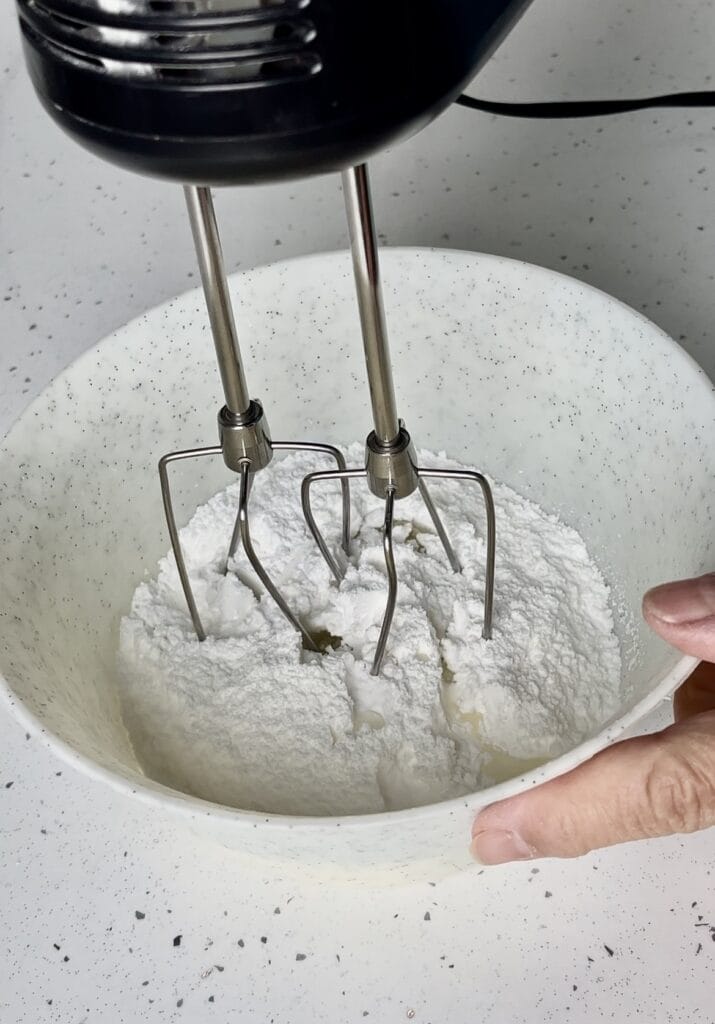
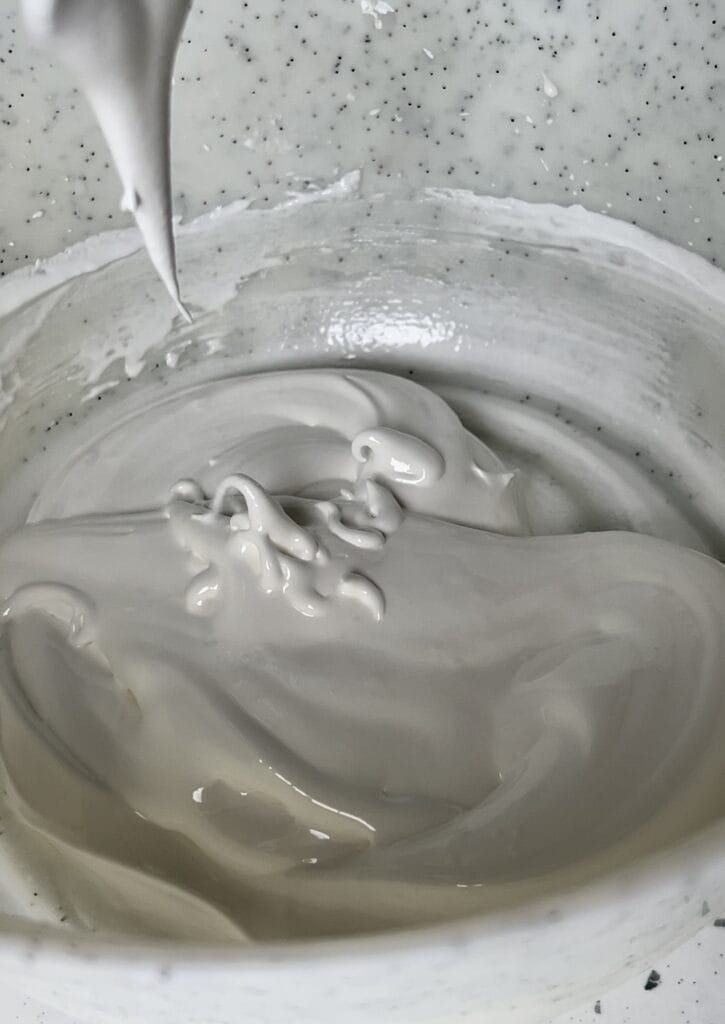
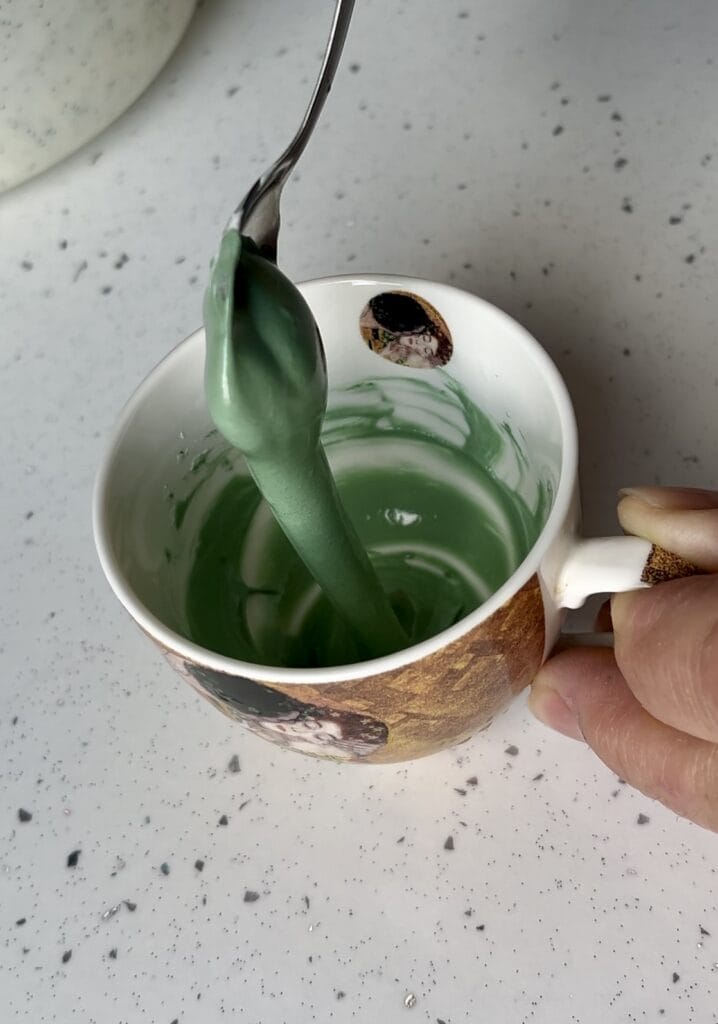
3. Mix to the right consistency – Mix the icing carefully, adding water little by little until you reach a consistency where a peak forms on a lifted spoon, curving slightly back down (see the picture below).
3. Royal Icing coloring
Proper coloring can elevate the appearance of (not only ) chrismas gingerbread cookies to a whole new level. If you decide to go for colorful decorations, I recommend using concentrated gel food colors, which won’t affect the icing’s consistency.
- A little color goes a long way – Add color gradually, as even a tiny drop can go a long way for subtle shades.
- For deeper shades – Add more as needed, but always mix slowly to maintain control over the color.
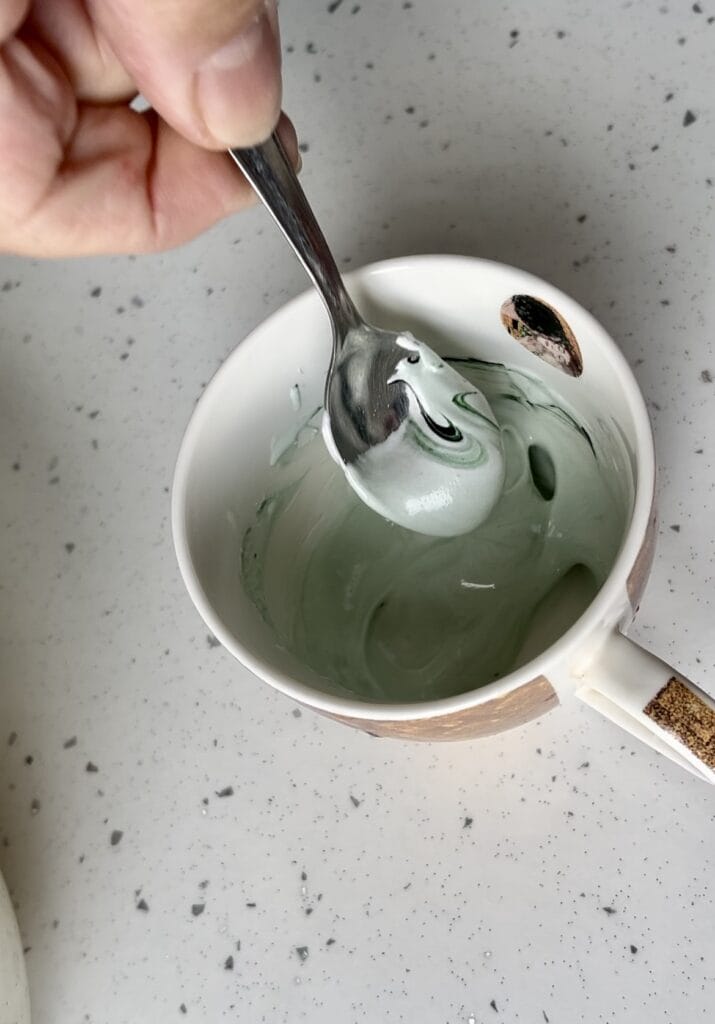
Try a marbled effect – For a unique look, swirl two colors lightly without fully mixing to create a marbled effect.
4. The Difference Between Basic Icing and Flood Icing
Flood icing, which is slightly thinner than basic icing, is used for smooth, flat coverage on the cookies. Gradually add water to the base icing until you reach a flowing consistency that spreads evenly across the cookie surface.

Flooding Steps:
1. Clean the cookies before flooding – Gently brush each one to remove any crumbs or specks.
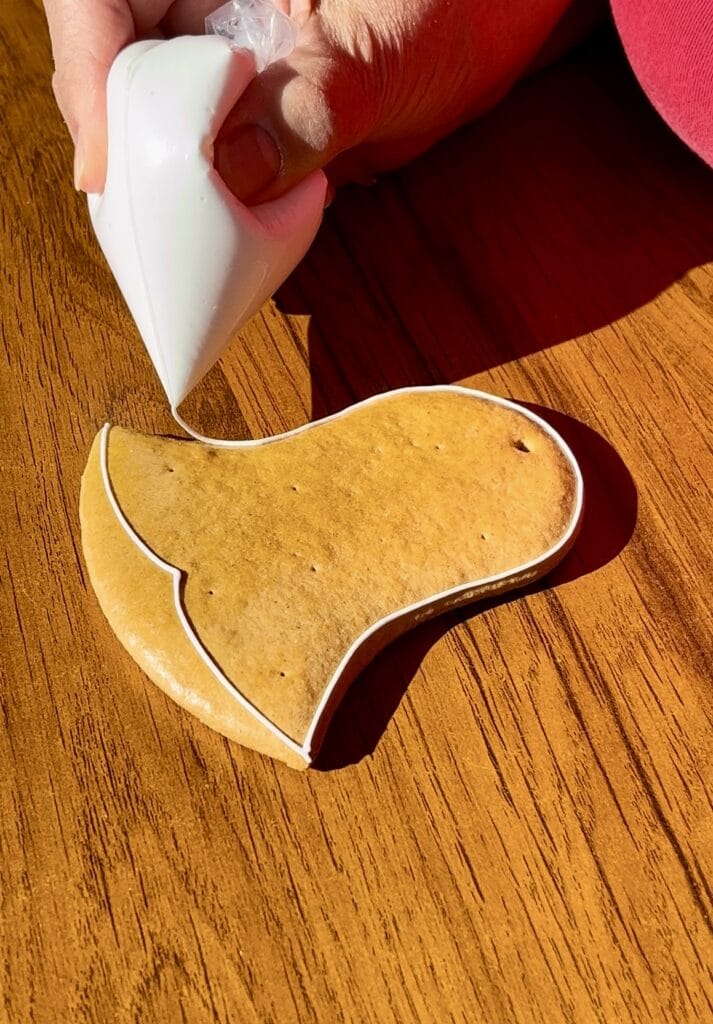
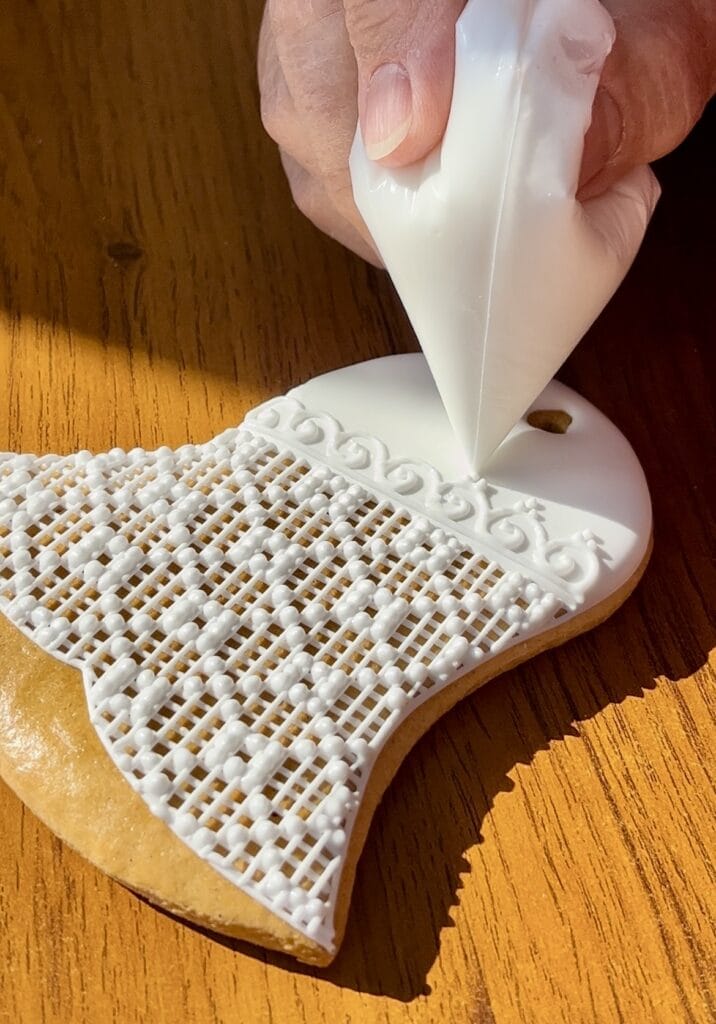
2. Create an outline – First, pipe an outline with thicker icing to hold the thinner flood icing within the cookie’s borders.
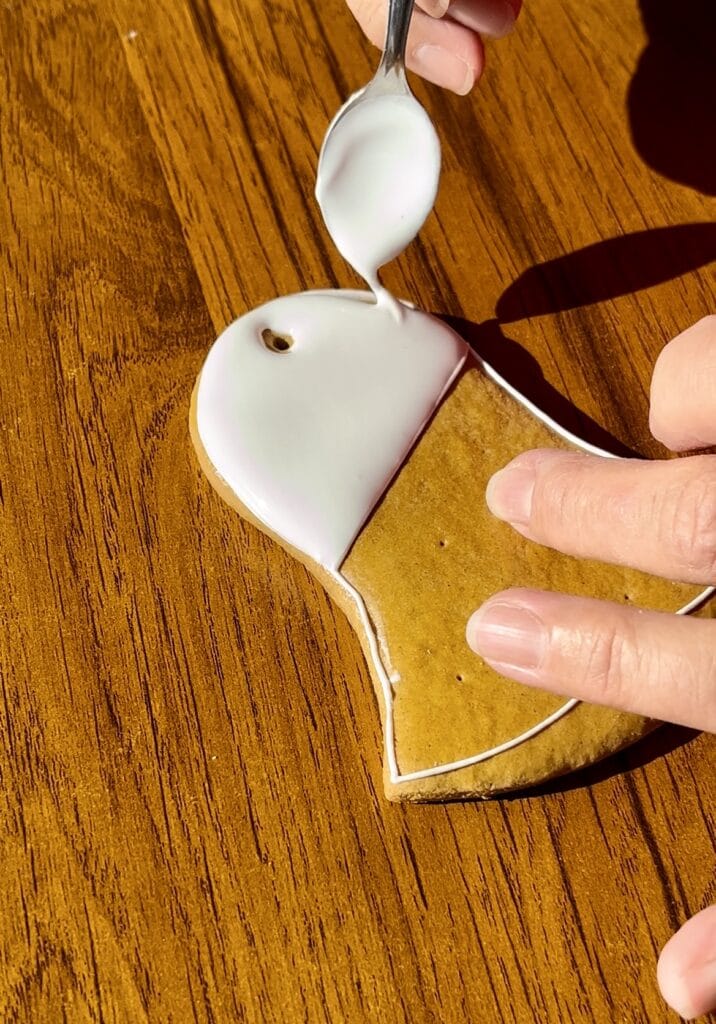
3. Flood the area – Once the outline is dry, fill the inner space with flood icing for an even, glossy layer.
4. Let each layer to dry– Before moving on to more decorations or patterns let the flooded layer dry. This can take 3-4 hours depending on the humidity and room temperature, as well as the size of the gingerbread cookie (for larger cookies even longer). Once the icing has set thoroughly, you can continue decorating with various techniques, creating patterns, layering, etc.
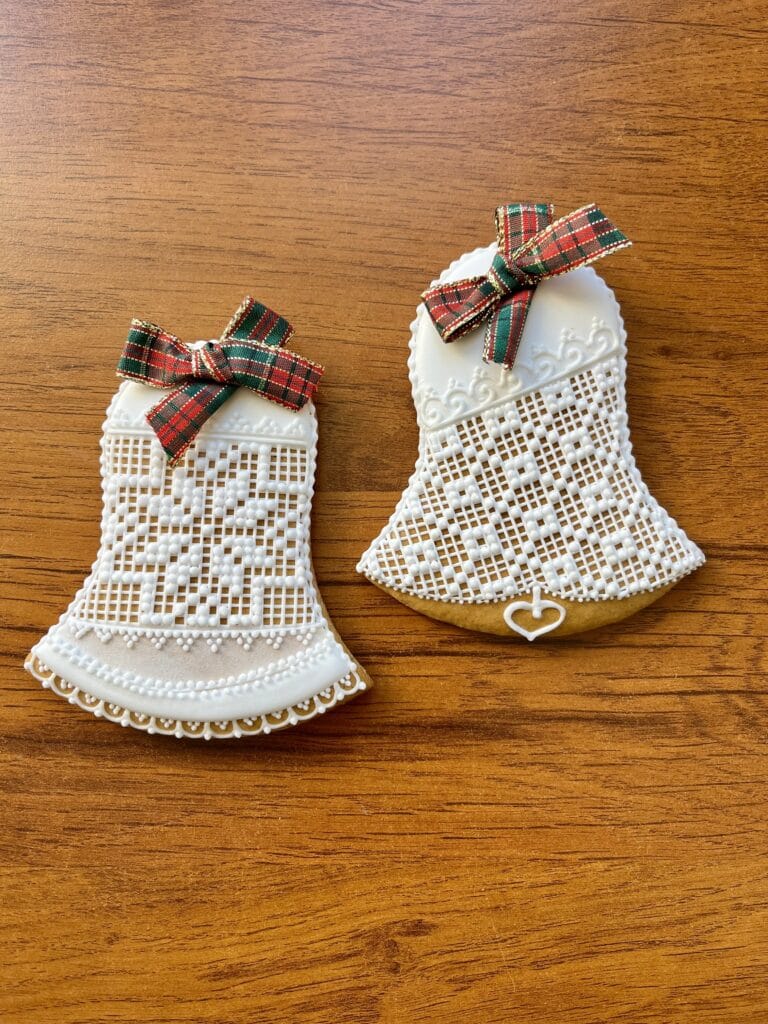
Gingerbread cookies decorating is an art form that brings satisfaction not just from the finished product but also from the creative journey and the joy of making something by hand. Each piece carries the time and patience you invested, turning it into a small work of art. This process reminds us that even simple things can become extraordinary when we give them enough love and attention.
Whether your cookies are decorated simply or with intricate patterns, the most important thing is to enjoy each moment of the process. Baking and decorating gingerbread cookies can be a wonderful time to gather with family, friends, or a peaceful moment to yourself. The finished cookies make lovely gifts that bring joy to others or beautiful decor that fills your home with festive charm.
And remember, there are no limits of decorating – whether you stick with traditional patterns or experiment with more modern, colorful motifs, every cookie will be a unique creation. Wishing you beautiful moments baking and creating, and may your holiday gingerbread cookies bring warmth and the taste of home!
For more about baking, decorating, or advanced techniques, be sure to follow my blog and social media for additional tips, tricks, and creative recipes.
Pridaj komentár